All

Technique of the week: Making your own sausages
Making sausages at home is not that difficult. If you’re planning on making sausages frequently, I recommend getting a grinder and a stuffer (both are available as attachments to a KitchenAid mixer), but you can also just make them with store bought ground meat, some seasonings, and a bit of ingenuity.
Follow these tips closely and you’ll have homemade sausages any time you want.
Use the right type of meat. We make our pork sausage fillings from primarily shoulder and belly meat, with added back fat if necessary. Lamb also makes a great sausage; if you get an older lamb, it will have more fat and a more pronounced flavor. Beef can make a decent sausage, but in my experience, you need a little pork fat to make it more succulent.
Aim for 25–30% fat. For a juicy sausage, you want the meat mixture to be 25–30% fat. If you’re buying pre-ground meat, ask for “fatty” ground pork. Most regular ground pork contains 15–20% fat, which is too lean for sausage.
Grind meat only when it’s cold. When you grind meat in a machine, the grinder often gets a little warm due to friction, which can cause an undesirable emulsification called “smearing”. Arrange your meat on a plate or a baking sheet and place it in the freezer for 30 minutes so it’s cold (but not frozen) when you grind it.
Make a slurry for the seasoning. Whatever seasoning you’re using for the sausage, mix it with enough water to create a slurry before combining it with the meat. This will help evenly distribute the spice throughout the mix so you don’t end up with unpleasant clumps of spice in your finished sausage.
Mix the sausage meat properly. You want to mix the sausage just enough to both distribute the seasonings and have the small pieces of ground meat stick to each other (that’s protein extraction at work). If the meat gets overmixed, it can emulsify, which causes the cooked sausage to have an undesirable texture. If the meat is undermixed, it can fall apart and crumble after cooking.
Choose your casing carefully. These are intestines that have been washed out and packed in salt. They will need to be soaked and rinsed in clean water a few times before using.
Soak the casings in water. We recommend using only all-natural casings from hogs and sheep, which are stored in salt, so rinse them well before stuffing them to improve their flavor and prevent them from drying out.
Use a sausage stuffer. We stuff our sausages by feeding the casings onto a cylinder that is attached to the stuffer. The sausage mix, or farce, goes into that sausage stuffer. Then we use a hand crank to coax the farce from the stuffer into the casings.
Or use parchment paper to form your sausages. If you don’t have a sausage stuffer, shape your sausage meat on a sheet of parchment paper. Set about 5 cups or so of the meat on a sheet of parchment, tightly roll the edge of the paper around the meat as if you were shaping a log, and keep rolling the paper to tighten the sausage. Seal both ends with kitchen twine. Remove the parchment before baking the sausage log in a 350°F oven for 10 minutes to set it, then cutting it into smaller pieces and frying it to brown the outside.
Or use a freezer bag to pipe your sausages. If you don’t have a sausage stuffer, you can place your sausage meat in a heavy-duty freezer bag and cut off one of the corners to create a makeshift piping bag. Squeeze the meat out of the bag to fill a natural casing. It’s slower than using a machine, but it gets the job done.
Don’t overstuff your sausages. A well-stuffed sausage should feel like a very ripe banana still in the peel. It should definitely have some give to it when gently squeezed. Overstuffed sausages can burst while cooking because the meat inside the casing expands as it cooks. Understuffed sausages can easily be fixed with a few more twists of the casing. A good method is to pinch the coil at the 6-inch mark and spin it forward a few times. Skip the next 6 inches, then repeat the double-pinch-and-forward-spin. This naturally creates a sausage in between. Many sausage makers suggest alternating between spinning the casing forward with one link and backward with the next, but this method avoids that added step.
Prick your casing. If you’re using fresh casing, fill it evenly to avoid air holes. To do this, simply ensure you have a steady stream of farce entering your casing. Most air holes occur when there are gaps in the flow. No matter what you do, you will get some air holes, though. The easiest way to get rid of them is by pricking holes in the piped sausage with a specialized tool or the tip of a sharp paring knife.
Have fun! Sausages are a delicious and satisfying product to make yourself, and I highly recommend doing it at least once in your life. But if you don’t want to, no worries – we’re always fully stocked with our own at Sanagan’s so you too can get into that sausage life this summer!

Tips for Cooking Ribeye Steak
Ribeye steaks are a forgiving cut. There is generally a lot of fat that will keep a steak juicy even if cooked to medium well or well done. Having said that, there are a few tips to cooking a great steak, no matter how you like it cooked (this content is abridged from my book Cooking Meat, where info like this and so much more is available).
Choose your cooking method for your ribeye. The three most common methods people use to cook steaks at home are pan-frying, grilling, and broiling.
Pan-Frying
- Heat a heavy-bottomed frying pan over a high heat. I prefer flat-bottomed cast iron pans because they retain the heat excellently and you can get a great caramelization on the surface of the steak.
- Season the steak generously with salt and pepper, then rub with vegetable or olive oil.
- Sear the steak in the hot pan until all sides are golden brown. The timing depends on the size and thickness of the steak, but as a rule of thumb, searing the steak for a minimum of 3 minutes per side will achieve the desired gold brown-ness.
- You can flip as many times as you think necessary, but aim for one flip during the cooking time. For thinner (less than 1-inch) steaks that means 2 minutes per side, and for thicker (2-inch) steaks that means 4 minutes per side. You’ll find the timing gets easier with practice.
- After the steaks are golden brown, turn the heat down to medium, add 2 Tbsp of butter to the pan with 2 sprigs of thyme, and finish cooking until the desired internal temperature has been reached (I like to use an internal thermometer to check for accuracy).
- For thick steaks (1-inch or thicker), rest the meat for a minimum of 8 minutes before serving. For thinner steaks (less than 1-inch), rest for 2 minutes before serving.
Grilling
- If you’re using propane/gas, heat half of your grill to high, and the other half to medium heat. If you’re using charcoal, arrange the hot coals on only one side of the grill.
- Season the steak generously with salt and pepper, then rub it with vegetable or olive oil.
- Sear the steak on the hot side of the grill, and flip it until it’s golden brown on both sides. The timing depends on the size and thickness of the steak, but as a rule of thumb, searing the steak for a minimum of 3 minutes per side will achieve the desired golden-brown crust. Be aware of how fatty your steak is, as melting marbling can cause flareups if you’re not paying attention.
- Move the steak to the cooler side of the grill and finish cooking until the desired internal temperature has been reached.
- For thick steaks (1-inch or thicker), rest the meat for a minimum of 8 minutes before serving. For thinner steaks (less than 1-inch), rest for 2 minutes before serving.
Broil
- Preheat the broiler to high heat. If cooking thick steaks (1-inch or thicker), place the oven rack on the second- highest position in the oven. If cooking thinner steaks (less than 1 inch), place it on the highest position.
- Season the steak with salt and pepper, then rub with vegetable or olive oil.
- Place the steak on a heavy-bottomed tray (ovens sometimes come with these; otherwise use a shallow ovenproof frying pan that will fit inside the oven with the door closed.
- Place the tray under the broiler and cook until golden brown, about 2 minutes, flip the steak, and repeat with the other side.
- Continue flipping to finish cooking until the desired internal temperature has been reached.
- For thick steaks (1-inch or thicker), rest the meat for a minimum of 8 minutes before serving. For thinner steaks (less than 1-inch), rest for 2 minutes before serving.
Knowing when the steak is done.
- The Finger Test: Simply touch your thumb to your pinky finger on one hand. Using your the index finger of your other hand, touch the meaty part of your thumb, near the base. That’s what a well-done steak feels like. Now touch your thumb with your ring finger: that’s medium. Touch your thumb with your middle finger: that’s medium-rare. Finally, touch your thumb to your index finger: that’s blue rare. I recommend trying this technique close to when you think the steaks are finished cooking. It’s common to see grill cooks in restaurants constantly touching the steaks, using their intuition and experience to judge when to take the steak off the grill.
- Internal Thermometer: This method is more exact, but it also depends on the quality of the thermometer and the thickness of the steak. For example, it’s great on a big côte de boeuf, but pretty useless with a skirt steak. The thicker the steak, the more accurate the internal temperature can be read. If the steak is thin, heat will travel through the muscle fibers more quickly, distorting the true internal temperature of the meat. Additionally, you’ll want to take a steak off the heat when it is 5 or 10 degrees cooler than the target temperature, as it will continue cooking for a bit as it rests.
|
Rare |
125°F |
|
Medium-rare |
135°F |
|
Medium |
140°F |
|
Medium-well |
150°F |
|
Well-done |
160°F |
Let it rest.
Resting a steak before serving it is always a good plan, as it allows the juices to settle back into the muscle fiber and prevents the juice from flowing away once the steak is cut. You’ll always have some juice come out of a steak, but resting minimizes it.

Value on the Grill - A Variety of Cuts That Won't Break the Bank
With everything in life getting more expensive, I wanted to take a second to highlight a few items we sell that are a great value. Don't get me wrong, I love a well aged and marbled rib eye, but the reality is I need ideas for cuts that will be good on any day of the week, and that means things that are going to be delicious, easy, and not break the bank.
Here are my top five value cuts, in no particular order:
1) Pork Shoulder Steaks. Sliced from the boneless butt, these well marbled slabs of pork are perfect for the grill. Excellent when marinated in Lemongrass and Ginger, or Fennel Seed and Garlic.
2) Hanger Steak. Also known as the "Butcher's Steak" due to its popularity amongst meat cutters, this iron rich muscle hangs off the rib cage on the inside of the carcass. It is actually classified as offal, but make no mistake, this is no liver. This is the beefiest steak you haven't tried yet.
3) Chicken Legs. This may seem like a no-brainer, but honestly most people are still mad for boneless skinless chicken breasts. The leg is half the price, and the meat is rich and moist, and will never dry out on your grill. And while a lot of people prefer boneless legs, I personally like the feeling and flavour of eating meat off the bone. Also takes very well to a marinade like Jerk or a spice rub.
4) Lamb Shoulder Chops. No matter how you cut it, lamb is one of the more expensive meats in the case. But next time you're in the mood, forgo the racks and loin chops and opt for the marbled shoulder chops instead. The meat is tender with only a slight chewiness, and the flavour is outstanding. Lamb shoulder chops are great when rubbed with a bit of garlic, rosemary, and a squeeze of lemon.
5) Sausages. Ok ok ok, I know what you're thinking. This is no secret cut. While that is totally true, I would like to remind everyone that we have so many different flavours, both fresh and smoked, that you could eat sausage every day of the week and not get bored. Seriously, they are perfect in a bun, or beside a slaw of some sort, or on mashed potatoes, or with noodles, the list is truly endless. And with one sausage costing on average around $2.50-$3, it is definitely a good value for the amount of flavour we pack in that casing.
There are definitely more cuts (I'll share more another day), but of you haven't tried any of these here, I hope you have some inspiration for your next few meals!

Butter, Spread the Love
By Graham Duncan
Spread on bread, baked into a cake or enriching a sauce, better butter is best.
Butter is milk fat, separated and solidified from cream by an agitation process called churning. If you take pure heavy cream at home and shake it or beat it long enough, you’ll be making butter. Standard butters are 80% - 82% butterfat, the remaining content being almost all water. High-fat butter is 84%. Does that make a difference? Read on.
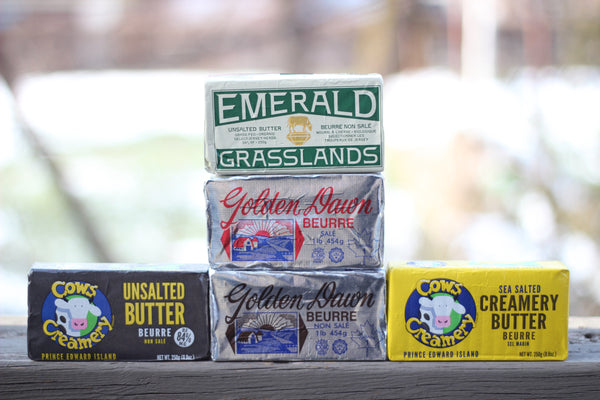
SANAGAN’S BUTTERS
GOLDEN DAWN SALTED AND UNSALTED
Golden Dawn salted and unsalted are high quality butters with the former being enthusiastically salty. Golden Dawn has been made at Alliston Creamery since the 1960’s. Owned and operated by the Kennedy family, Alliston Creamery is the last small independent dairy in Ontario. Alliston favours small scale production barrel churns which produce flavourful small batches of butter.

Photo: Alliston Creamery
A batch of butter just out of Alliston Creamery barrel churn
COWS CREAMERY SEA SALTED AND UNSALTED
COWS butter is so good we decided to import it all the way from Prince Edward Island. COWS Creamery comes in 84% butterfat which makes for outstanding baking. To confirm this, we whipped up two identical batches of scones, one made with COWS Sea Salted butter and the other with No Name salted butter. In a blind scone tasting (my new blues name) there was no mistaking the difference. The COWS scone was decisively richer, saltier and more, uh, buttery.
Take a video tour of the COWS Creamery butter facility here.
EMERALD GRASSLANDS SEA SALTED AND UNSALTED
Churned at Alliston Creamery from the cream of organic, grass-fed, Jersey cows. Jersey milk is renowned for its fat content and for its rich yellow colour. Both of these properties translate directly into Emerald butter with its pronounced golden hue and 84% butterfat content. And make no mistake, their southwestern Ontario cows’ all-grass diet — pasture in the summer, hay in the winter — give this butter an unmistakable depth of flavour. The salted version is made with sea salt from Vancouver Island. Emerald is as dedicated to creating a special kind of butter as they are to ensuring the sustainability of the grass-fed dairy industry.
A Hopefully Not Too Dry Article About Dry Aged Beef
By: Graham Duncan
Not long ago my wife and I shared a Sanagan’s cote de boeuf. We were on our own at an 100-year-old cottage in Muskoka. There was red wine, there was salad and there was that majestic slab of 50-day dry aged rib steak. It was an absolutely simple and memorable dinner, as a meal can be when it features ingredients of the highest standard.

So the question is, what makes dry aged beef such a significant culinary experience?
Dry aging has been part of carnivorism for as long as humans have understood that changes occur to an animal’s flesh after it dies, the most obvious example being rigor mortis. For centuries beef and game have benefitted from various forms of controlled aging. While modern processing techniques sidestepped the procedure, nothing can replicate the flavours and textures resulting from the painstaking tradition of professionally dry aged beef.

Sanagan’s dry aging fridge is a funky place indeed. In this low temperature, moderate humidity environment sub primals (bulk cuts) of bone-in rib and strip loin sections bide their time, slowly growing crusty exteriors that will later be trimmed away. During this period our friends, the enzymes go to work .

Enzymes are molecules that accelerate chemical reactions in cells. With beef, enzyme actions enhance flavour by converting: proteins into savoury amino acids; glycogen into sweet glucose; and fat and fat-like membranes into aromatic fatty acids. At the same time, they’re working their magic on tenderness too, breaking down collagen fibres.
But what age is the perfect age? 28-days is the steakhouse standard (or that’s when your steak turns into a zombie). Some establishments probe the outer reaches of aging with 120-day-old rib steaks, all gnarled up like Yoda. Assistant head butcher Christopher Spencer, who’s been overseeing the Sanagan’s dry aging program since 2018 explains our process: “We experimented; just a lot of testing. Anything more than 60 to 70 days gets very cheesy. We found that 40 to 50 days achieves a good balance of accessible aged flavour”.

And just what is that aged flavour? I think the only way to describe it is steak-ier. Those elements of savoury juicy succulence that makes your mouth water when you think of a steak are all refined in a dry age steak. There’s oxidized fat lending aromatic depth, all the gelatinized protein (enzymes!) creating that melt-in-your-mouth thing, the absolutely indescribable flavours of age; you know like wine, like cheese. If you’re familiar with the concept of umami, that gives you an idea. But really, words don’t do the trick. You’ve got to try it for yourself. But you’ll have to find your own cottage.
Peter Picked a Peck of Manning Canning Pickled Products

by: Graham Duncan
Did you know that at one point, Peter was thinking of changing the name of the business to Sanagan’s Meat, Charcuterie, Prepared Foods, Sauces, Pickles, Rubs, Mustards, Produce, Gelato, Dairy, etc. Locker? Wouldn’t fit on the sign though. But we’re definitely more than meat. We’re happy to share our shelves with local food entrepreneurs who produce fantastic Ontario-made goodies.
One of those people is Christine Manning of Manning Canning. Her story is indicative of the food community we work with. After a successful career in marketing, Christine’s hobby of making preserves became her second act, an undertaking that not only encompasses producing and marketing prizewinning preserves and pickles but the creation of a full-service rental kitchen supporting numerous other independent eat-trepreneurs.
“We believe a rising tide lifts all boats”, says Christine. “There was no rental kitchen when I started out. I thought an affordable space would help others. Everyone thinks a food business is a low barrier start up but a commercial kitchen is expensive.”

“We’ve always competed on taste. We only make products based on seasonal availability, like the green beans. We only make them when we can get them fresh from the fields. We actually process our fresh plum tomatoes, they don’t come in a bucket.” How serious are they about fresh ingredients? Imagine having your marmalade win a gold medal at the World’s Original Marmalade Awards and then you decide, because you can’t guarantee a reliable, affordable supply of quality Seville oranges, that you would stop making your Gold Medal Marmalade. Manning Canning does not compromise.
That’s why Sanagan’s entrusts the production of our Giardiniera and Pickled Red Onions to Christine and Company.

Here’s a full list of our Sanagan’s/Manning Canning product line.
Charcuterie boards of the world unite; Sanagan’s Giardiniera, an Italianate mix of pickled peppers and veggies packed in oil and vinegar is here to help. And beyond. Salads, sandwiches, pizza — the zesty possibilities are endless.
You just won’t know how versatile these babies are until you have them in your fridge. Case in point — last night’s doggy bag of perogies. I threw some pickled onions on that bland plate of leftovers and—Hey Now—those perogies were energized! Ditto, burgers, cheese plates, meat pies—need I go on?
Manning Canning Spicy Pickled Carrots
M.C.’s all-time bestseller. Spicy, crunchy, zippy. Don’t even think of mixing up a Bloody Caesar without them. Perfect in potato or tuna salad. And I bet they’d be awesome along with baked beans.
Manning Canning Spicy Pickled Green Beans
Old-school steak houses often lay out a tray of pickles at the start of a meal as appetite stimulators. Carry on that tradition at home with M.C.’s green beans before you serve one of our beautiful steaks.
Manning Canning Angry Pickled Garlic
Not only can you enjoy the pickled garlic but save the brine for use in a vinaigrette or make your dirty martini an angry martini. Or re-brine something else and reawaken all that garlicky goodness.
Manning Canning Tomato Mustard
Remember those fresh plum tomatoes? They’re here in spades. The apple cider-soaked mustard seeds pop with flavour. Great in dressings or on burgers. Also a fantastic marinade for pork.
Pig Out. The Rise and Fall of Hogtown.
Before Drake proclaimed that we all live in The Six, Toronto’s original alias was Hogtown. A number versus a pig; The Big Apple we ain’t. But we sure used to slaughter a lot of pigs.
Sanagan’s currently carries pork from three Southern Ontario family farms. Like all Sanagan’s suppliers, our pork farmers value small scale, humane animal husbandry. The pigs are processed at low volume facilities located near the farms. By contrast the abattoirs that inspired the name Hogtown were anything but small scale. So, while Sanagan’s embraces a different approach to the life and death of the pig, we’re proud to be selling great pork in Hogtown and thought you might be interested to know how the name came to be.

Sanagan’s heritage pork raised on Murray’s Farm
If the name Hogtown can be attributed to one person, it would be William Davies whose ascent from a single St. Lawrence Market stall in the 1850’s to the establishment of Canada Packers (now Maple Leaf Foods) firmly implanted the pig’s footprint on Toronto’s identity. Along the way the William Davies Corporation became the largest supplier of bacon to England, shipping out of North America’s second largest pork processing plant, located in the Don Valley at Front Street. Davies is credited with popularizing peameal bacon, making him the Godfather of Toronto’s signature sandwich. Eventually the animal world tired of Mr. Davies attentions. He died as a result of injuries suffered after being butted by a goat.
It’s not difficult to witness a herd mentality at Keele and St. Clair as shoppers descend upon Home Depot and Canadian Tire, but this area used to support actual herds of cattle, pork, and horses. The Stockyards, a 300-acre network of rail sidings, loading platforms, stock pens, and processors, including Maple Leaf and Swifts, was once North America’s largest livestock facility. The fortunes of the Stockyards rose and fell with the railroad. By the time trucking eclipsed rail as the most efficient form of livestock transport, and combined with the pressures of Toronto’s ravenous real estate market, the demise of the Stockyards was inevitable. The majority of processors moved from Toronto to Cookstown in 1994 but not after doing its share to consolidate our nickname as Hogtown.

Toronto Stockyards
Up until its closure in 2014, for many Torontonians the name Hogtown was embodied by Quality Meat Packers on Tecumseth Street near Fort York. Even if you never saw the abattoir there’s a good chance you saw the trucks, loaded with pigs, driving towards it. I remember working at Fort York in my early 20’s. You either got the industrial beer smell of the Molson’s brewery or the raunchy not quite bacon smell of Quality Meats. Grimly, it felt historically accurate. There had been a packing plant on the site since 1914 in the form of the Toronto Municipal Slaughterhouse. This facility was bought in 1960 by Quality Meats. At its height, Quality processed one third of Ontario’s pork. While it defied animal rights protests and condo-mania it was eventually brought down by the cruel variables of the free market. The last straw was the piglet-killing virus of 2014. Thankfully for Sanagan’s, and the pigs, our small-scale pork farmers were unaffected by the outbreak.

The original site of Quality Meat Packers
Things change. The hogs have left Hogtown. Toronto’s de-industrialization has been rapid. But high quality, locally raised, family-farmed pork will never leave Sanagan’s and Sanagan’s, finger’s crossed, will never leave The Six.
Graham Duncan
Photos: Graham Duncan and Toronto Archives
Sanagan's Picnic Basket
 Spreading out a blanket, sitting in the sun, eating, drinking, maybe a touch of postprandial Frisbee: the picnic is summer at its best. And during the pandemic, it’s a responsible way to socialize with those beyond your bubble. If food tastes better outside, then imagine how good our all-Ontario products will be al fresco. All you have to do is stock your cooler with our charcuterie, cheeses, salads and accompanying condiments and you’re ready for a class repast on the grass. Just add bread and beverages.
Charcuterie
Packaged salami and cured meats from our deli selection are the ultimate in no-cook feast-ability. A little bit of bread and mustard doesn’t hurt either. Prosciutto, Soppresatta, Black Forest Ham and Summer Sausage are just a few examples of picnic perfect deli meats. Or go minimalist with a backpack compatible selection of jerkies, biltong and pepperettes.
Pâtés and Terrines
Created by our charcutier, Scott Draper, these classic preparations are portable servings of delectability made with the same locally sourced meat you see behind our counter. Luxurious selections such as Pâté Forestier, Pâté de Campagne, Pork & Dried Fruit Terrine and Duck Liver Mousse can be spread on bread or crackers and elevate your nature noshing with French culinary traditions.
Salads
When you head out to the green fields be sure to take some of our greens with you. Anne Hynes and the kitchen team have house-made salads that will keep your picnic delicious and balanced. Lentil and Pear Salad, Beet, Orange and Feta Salad and Kale Super Salad should definitely be on your summer dining shopping list. Or take your own greens and anoint them with our House Vinaigrette.
Roasted Chicken
Our fantastic King Capon Farms chickens are coated in our Sanagan’s Rub, roasted, vacuum-packed and chilled. Here’s where a genetic mutation that gives you some extra fingers would be good because you’ll want to lick as many as possible.
Cheese
We’re sure it’s not news to you that Ontario is home to some great independent cheese makers and Sanagan’s is proud to supply their products to you. Enhance your hamper with selections like: Monforte’s Providence; Stonetown’s Emmental or Thornloe’s Cheddar.
Pickles and Condiments
Our kitchen makes numerous mustards, jellies and pickles that can jazz up your al fresco feast. Maybe a little Beerhall Mustard on your Summer Sausage? Maybe a little Rhubarb and Lavender Jelly with your Monforte Emmot cheese? Maybe some Chili Infused Garlic Scapes with your Pâté de Campagne? Actually, there’s no maybe about it! Along with our house-made products, we carry an outstanding lineup of All-Ontario jarred goods that are picnic classics: Aunt Lovina’s relishes; mustards by Kozliks and Brü; Apple Flats Crab Apple Jelly (says right on it, “try it with cheese”). Simplest picnic in the world? A jar of Sanagan’s Pickled Eggs on the fire escape.
So, stash the stove, grab the lawn chairs, come to Sanagan’s, pick a park, find a field or bivouac in a bower. Summer only lasts so long.
Spreading out a blanket, sitting in the sun, eating, drinking, maybe a touch of postprandial Frisbee: the picnic is summer at its best. And during the pandemic, it’s a responsible way to socialize with those beyond your bubble. If food tastes better outside, then imagine how good our all-Ontario products will be al fresco. All you have to do is stock your cooler with our charcuterie, cheeses, salads and accompanying condiments and you’re ready for a class repast on the grass. Just add bread and beverages.
Charcuterie
Packaged salami and cured meats from our deli selection are the ultimate in no-cook feast-ability. A little bit of bread and mustard doesn’t hurt either. Prosciutto, Soppresatta, Black Forest Ham and Summer Sausage are just a few examples of picnic perfect deli meats. Or go minimalist with a backpack compatible selection of jerkies, biltong and pepperettes.
Pâtés and Terrines
Created by our charcutier, Scott Draper, these classic preparations are portable servings of delectability made with the same locally sourced meat you see behind our counter. Luxurious selections such as Pâté Forestier, Pâté de Campagne, Pork & Dried Fruit Terrine and Duck Liver Mousse can be spread on bread or crackers and elevate your nature noshing with French culinary traditions.
Salads
When you head out to the green fields be sure to take some of our greens with you. Anne Hynes and the kitchen team have house-made salads that will keep your picnic delicious and balanced. Lentil and Pear Salad, Beet, Orange and Feta Salad and Kale Super Salad should definitely be on your summer dining shopping list. Or take your own greens and anoint them with our House Vinaigrette.
Roasted Chicken
Our fantastic King Capon Farms chickens are coated in our Sanagan’s Rub, roasted, vacuum-packed and chilled. Here’s where a genetic mutation that gives you some extra fingers would be good because you’ll want to lick as many as possible.
Cheese
We’re sure it’s not news to you that Ontario is home to some great independent cheese makers and Sanagan’s is proud to supply their products to you. Enhance your hamper with selections like: Monforte’s Providence; Stonetown’s Emmental or Thornloe’s Cheddar.
Pickles and Condiments
Our kitchen makes numerous mustards, jellies and pickles that can jazz up your al fresco feast. Maybe a little Beerhall Mustard on your Summer Sausage? Maybe a little Rhubarb and Lavender Jelly with your Monforte Emmot cheese? Maybe some Chili Infused Garlic Scapes with your Pâté de Campagne? Actually, there’s no maybe about it! Along with our house-made products, we carry an outstanding lineup of All-Ontario jarred goods that are picnic classics: Aunt Lovina’s relishes; mustards by Kozliks and Brü; Apple Flats Crab Apple Jelly (says right on it, “try it with cheese”). Simplest picnic in the world? A jar of Sanagan’s Pickled Eggs on the fire escape.
So, stash the stove, grab the lawn chairs, come to Sanagan’s, pick a park, find a field or bivouac in a bower. Summer only lasts so long.A Trip to Forsyth Farm
It was a grey and cool late summer day when Brian and I drove up to Shane and Brenda Forsyth’s farm on the Bruce Peninsula, just off the wind-swept west side of Georgian Bay. The land around this area is difficult to farm – the soil is rocky and not as rich for produce as the land around southern Ontario, where Shane grew up. As a young man, he decided to move north to start his farm; land was cheaper, and anyways, sheep and lamb didn’t need lush vegetation to thrive. This was back in the early eighties – Brenda found her way to the farm the following year, and they’ve been raising a family and their animals ever since.
Shane and Brenda have about 400 ewes on their farm; each one gives birth about three times every two years. One of the reasons I’ve been working with them for over a decade is because their lamb is consistently flavourful, with a lean finish and firm muscle. When asked what they do to maintain this consistency, Shane modestly shrugs and tells me it’s probably because they prefer to raise their lambs in a more traditional way. He explains:
“In modern lambing, lambs are weaned from their mothers at around 6 weeks, then fed a soy-based formula that quickens their development. I prefer to keep them with their mothers for at least 3 months. Then I’ll wean them off, having them eat as much grass as possible. When they get up to eighty pounds, we’ll finish them with lot of hay, and some dried peas, barley, and oats. This will get their weight up to about 110 lbs or so, that’s when they’re ready for market. Sometimes they’ll hit that weight at 5 months, sometimes at 10 months; it all depends on the animal.”
Whatever age Shane and Brenda’s lambs are, one thing is for certain. They produce some of the best tasting meat I’ve had. It may be the wild apples they munch on (wild apple trees are one of few trees that flourish around this part of Ontario). Or maybe it’s the damp cool air blowing off of Georgian Bay that forces the animals to eat a little more to bulk up. Or maybe it’s the care Shane and Brenda have and bring to these animals, day after day. I like to think it’s the latter, and after having spent the day with them, that care can be seen in how they treat guests as well. (I didn’t tell you about Brenda’s delicious cabbage borscht and fresh rolls – that might be for a different post).