All
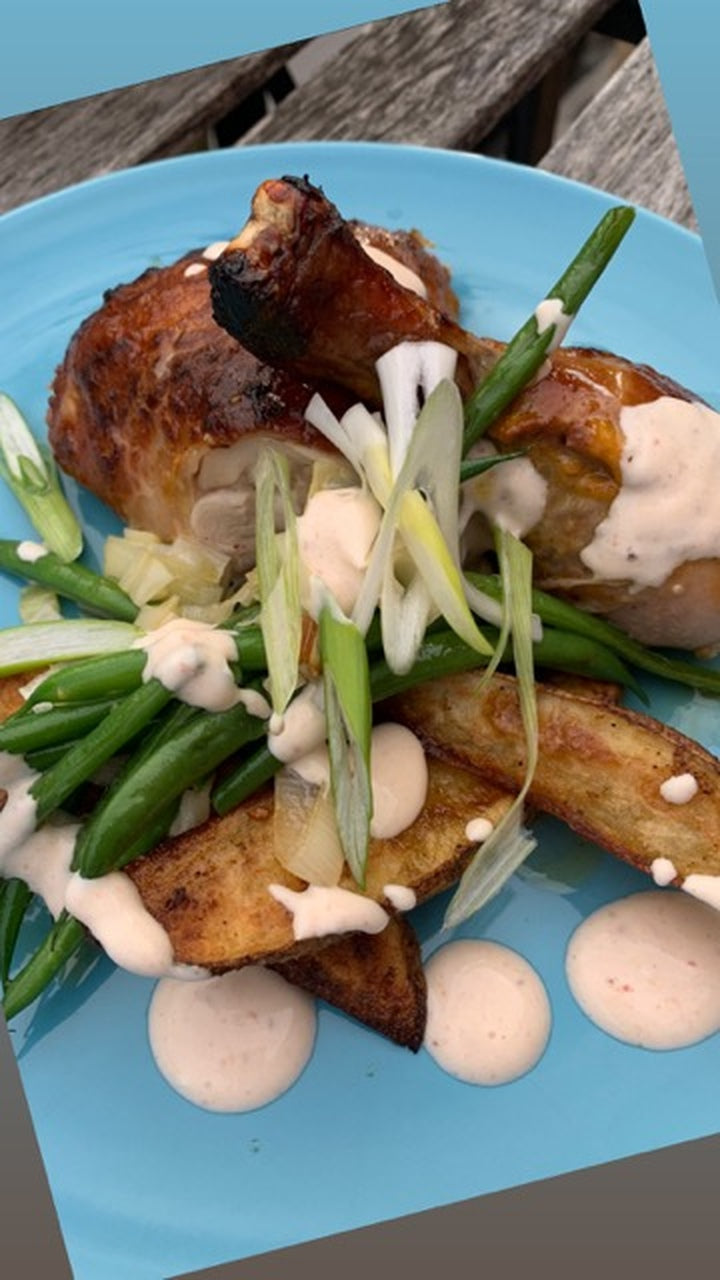
Chef Amanda Ray's Yogurt and Harissa Marinated Chicken
 During this time, I, like so many others, have been cooking in my kitchen more than ever before…such a rarity for most chefs. I see so many friends on social media (chefs and non) cooking, enjoying (...well not always) and finding pleasure making a meal, taking the time to slow down.
Food is so many things but often we cook our feelings, going to comfort foods in times of stress or anxiety. I know I went through my repertoire of my family comfort food favs. Then I moved on to travelling to other countries to feature cuisines from places I’d either been to or ones that are on my list of places to go next. That’s the only travelling I’ll be doing for some time, I think.
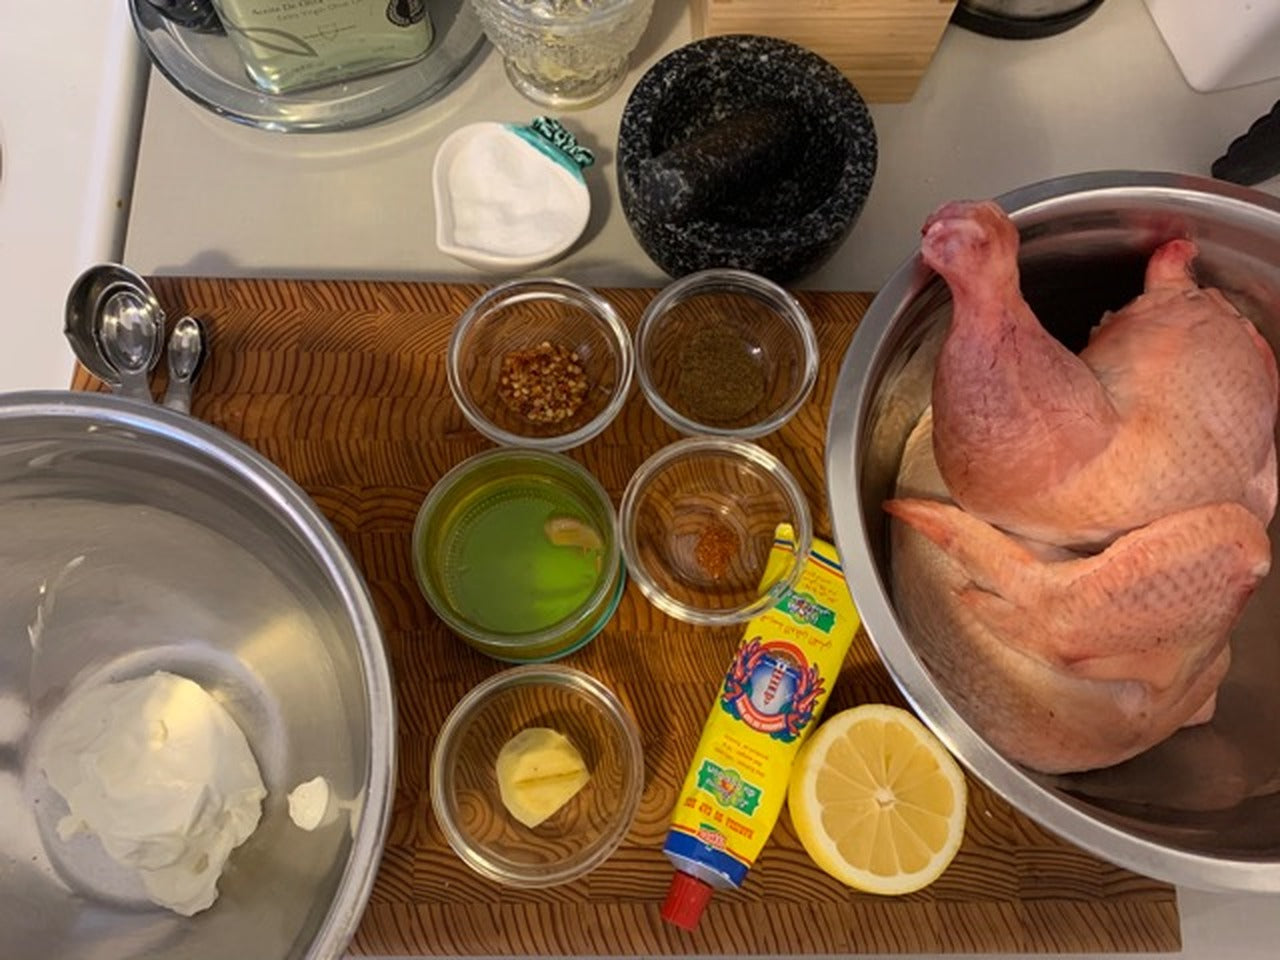
The dish I wanted to make was a harissa & yogurt marinated chicken. I love harissa, it’s a hot chili paste that is commonly found in North African cooking, mainly Moroccan, Algerian, and Tunisian cuisines. You can purchase it in Middle Eastern stores generally. Sanagan’s sells the locally made El Tounsi brand https://www.eltounsifoods.com/ , or you can make your own version. I also love using yogurt as a marinade, the lactic acid in fermented dairy products, such as yogurt and buttermilk, react with the proteins at the molecular level. It also creates a great texture and flavourful crust; the dairy caramelizes beautifully.
I don’t have a BBQ but there is something incredible about grilling meats that have been marinated with yogurt, it’s that combination of caramelized yogurt and that smoky flavour. Next up, I just need to buy a BBQ & life will be complete!
During this time, I, like so many others, have been cooking in my kitchen more than ever before…such a rarity for most chefs. I see so many friends on social media (chefs and non) cooking, enjoying (...well not always) and finding pleasure making a meal, taking the time to slow down.
Food is so many things but often we cook our feelings, going to comfort foods in times of stress or anxiety. I know I went through my repertoire of my family comfort food favs. Then I moved on to travelling to other countries to feature cuisines from places I’d either been to or ones that are on my list of places to go next. That’s the only travelling I’ll be doing for some time, I think.
The dish I wanted to make was a harissa & yogurt marinated chicken. I love harissa, it’s a hot chili paste that is commonly found in North African cooking, mainly Moroccan, Algerian, and Tunisian cuisines. You can purchase it in Middle Eastern stores generally. Sanagan’s sells the locally made El Tounsi brand https://www.eltounsifoods.com/ , or you can make your own version. I also love using yogurt as a marinade, the lactic acid in fermented dairy products, such as yogurt and buttermilk, react with the proteins at the molecular level. It also creates a great texture and flavourful crust; the dairy caramelizes beautifully.
I don’t have a BBQ but there is something incredible about grilling meats that have been marinated with yogurt, it’s that combination of caramelized yogurt and that smoky flavour. Next up, I just need to buy a BBQ & life will be complete!
 For Harissa (if making it yourself)
Makes approximately 1 cup
Ingredients:
2 tsp coriander seeds (or 1¼ tsp of ground coriander)
1 tsp cumin seeds (or 1¼ tsp of ground cumin)
1 tsp caraway seeds (or 1¼ tsp of ground caraway)
2 tbsp paprika
1 tsp red chili flakes
3 cloves garlic, peeled
1 red bell pepper, roasted, peeled and seeded
To taste sea salt
2 tbsp extra-virgin olive oil, plus more to coat the top of the harissa
Method:
For Harissa (if making it yourself)
Makes approximately 1 cup
Ingredients:
2 tsp coriander seeds (or 1¼ tsp of ground coriander)
1 tsp cumin seeds (or 1¼ tsp of ground cumin)
1 tsp caraway seeds (or 1¼ tsp of ground caraway)
2 tbsp paprika
1 tsp red chili flakes
3 cloves garlic, peeled
1 red bell pepper, roasted, peeled and seeded
To taste sea salt
2 tbsp extra-virgin olive oil, plus more to coat the top of the harissa
Method:
- Preheat the oven to 350°F.
- In a small bowl, combine the coriander seeds, cumin seeds and caraway seeds. Spread the spices on a sheet tray and toast in the oven for 1 to 2 minutes; you should faintly detect the scent of the spices. Remove the tray from the oven and set aside to cool. Add the paprika and chili flakes to the spice mix.
- Using a mortar and pestle (or, alternatively, a food processor), grind the garlic cloves until they become a paste, and then add the red bell pepper. Season with salt, and then add the spices and the 2 tablespoons of extra-virgin olive oil and blend well. When blended, transfer the harissa to a container and top with some additional olive oil. This will keep for 3 to 6 weeks, covered, in the refrigerator.
 Method:
- In a large bowl, combine the yogurt, ginger, ground cumin, chili flakes, espelette pepper, harissa, olive oil and salt. Whisk until smooth and pour into a baking dish.
- Lay the chicken halves, skin-side up, in the yogurt mixture. Cover with plastic wrap and refrigerate for a couple of hours to marinate. (You can make the marinade the day before and marinate overnight).
 If cooking in the oven:
- Pre-heat oven to 400°F and line a large, rimmed baking sheet with parchment paper or foil for easy clean-up. Place marinated chicken skin-side up, drizzle with a little olive oil and season with salt & pepper. Turn temperature down to 375°F.
- Roast the chicken until an instant-read thermometer inserted into the thigh registers between 155°F and 160°F, 35 - 40 minutes.

Archeologists Love Haggis
This January 25, the gang at ASI Archeology will hold their 32nd annual Robert Burns Day office party and Sanagan’s is proud to be their Official Purveyor of the Haggis. Or is it Offal-icial Purveyor?
Our house-made haggis features offal from our Ontario lamb combined with oatmeal, onion, lard and seasoning in an all-natural beef bung. We are honoured to supply it to ASI and to you for your Robbie Burns celebrations.
Martin Cooper is the Senior Archeologist at ASI and the driving force, all these years, behind the party. One assumes he’s steeped in Scottish ancestry and goes around saying things like “ach” while playing golf in the rain.
“I’m actually Jewish. I have no Scottish blood at all”, he explains, with a laugh, from across the boardroom table at ASI’s office on Bathurst Street. “But when I was growing up, my backyard in North York faced onto the backyard of the Colonel of the 48th Highlanders and every summer he’d have the whole pipe band in the backyard”. Who could resist such an onslaught of Scottishness? While majoring in archeology at U of T Martin, a.k.a. Rabbi Burns, minored in Romantic Revivalist poetry, reading lots of the Ploughman Poet. So once he established the original ASI office above his father’s dental practice in the ancestral Kensington/Annex neighbourhood, it went without saying that they’d whoop it up Scottish style every Burn’s Day. “Even then we’d pipe in the haggis. The piper would have to tune up in the patients waiting room”.
Whatever your Burn’s Day party origin story may be, we can help with the haggis. Just call 416-534-9747 and place your order.

Summer in January
Sittin’ in the backyard, tunes playin’, drinkin’ beer, eatin’ fried chicken. Oh man, can’t you just feel the sunshine and the grass between your toes? That’s what we need RIGHT NOW. We need that taste of summer. We need that culinary thaw. We need that greasy getaway. We need fried chicken!
Admittedly, with all the oil and frying smell and everything, fried chicken isn’t the easiest meal to produce but here’s the thing — while sitting around with a group of friends the other night, I mentioned that I was going to be frying chicken and simultaneously three people exclaimed, “did you say fried chicken?” So it’s worth the hassle.
And really it’s not that big a deal. Here’s my tips for relatively spontaneous, delicious fried chicken.
• Brining the chicken or soaking in buttermilk is great but completely unnecessary if you are using fresh, young chicken like Sanagan’s fryers.
• Whole wings, thighs, drums and breasts, cut in two across their length, (this equals 10 pieces out of one chicken) will all cook in about the same time.
• A wok will contain splattering better than a frying pan. A frying pan, however, will accommodate more pieces at once.
• It’s better to fry in batches than crowd the pan.
• Canola or peanut oil will work fine and minimize odors to but don’t underestimate the extra delectability of pure unprocessed lard like we make here at Sanagan’s
• An instant read thermometer will help prevent burning or undercooking your chicken.
• Observe all common sense safety considerations when working with hot oil or fat, i.e. shorts and bare feet may not be the best idea.
FRIED CHICKEN
1. Cut a fryer chicken into 10 pieces (see above) or use precut chicken pieces. DO NOT dry pieces with paper towel. Leave them moist.
2. Mix 1 cup flour, 2 tsp. salt, and 1 tsp. pepper in a paper or plastic bag. For more flavour you can also season the chicken pieces directly, prior to coating them in flour.
3. A couple at a time, toss chicken pieces in the bag to coat. Shake excess flour from chicken and place on rack to “set” the coating. This rest can be anywhere from 15 minutes to 30 minutes before frying. If, after the set, the flour has been absorbed and is no longer visible as a coating, feel free to do another toss and shake before frying.
4. Slip chicken skin side down into 350°F oil or fat. Cover and fry for ten minutes. Try to maintain a constant oil temperature of 300°F - 325°F. Check occasionally to ensure bottom side of chicken isn’t browning too much.
5. Uncover, turn chicken delicately with tongs, and cook uncovered for 8 to 10 more minutes or until breasts reach an internal temperature of 160°F and thighs 170°F - 175°F
6. Don swimsuit and commence to eatin’.
Lamb Shanks with Sumac, Mint, and Roasted Eggplant
Roasted Prime Rib
Turkey Tips
Beef, Pork, and Barley Meatloaf

THIS ARTICLE TAKES LONGER TO READ THAN IT TAKES TO FRY A PORK CHOP
Here’s an oft overheard exchange at Sanagan’s
Customer - “How long should I fry these pork chops for?”
Meat Hawker - “Um, that’s a tricky one.”
So first, let me answer directly.
1 ¼ inch-thick bone-in rib chops, fried at medium heat, take 12 minutes to reach the government approved 160 degrees Fahrenheit.
¾ inch-thick centre cut chops; 6 minutes 45 seconds.
But if you just follow these instructions and end up with under or overcooked chops, don’t blame me. You gotta read this whole thing to really dig the pig.
To explore the eternal pork chop frying riddle, I employed a plain old glass top stove, a cast iron frying pan, a reasonably accurate meat thermometer and a stopwatch app.
Method:
A medium-sized cast iron pan receives a long preheat on one of the stove’s large elements dialled to #5 (exactly medium). On my stove, this setting, once it’s fully achieved, is more like a medium-hot. A small dribble of oil is then added to the pan. I’m using canola oil here, mainly because of it’s high smoking point. My fire alarm appreciates the consideration.
All the pork chops were cooked straight out of the refrigerator.
All meats were also given the customary post-cooking rest. This allows the meat, especially the very hot surface of the meat to cool, thereby retaining more moisture.
The chops were seasoned with salt and pepper, just before frying.
1 ¼ INCH FRECHED RIB CHOPS
These beauties are from the loin adjacent to the rib cage. They are cut thick to accommodate the rib bones and provide you with delectable tender pig steaks.
This loin chop hit the pan with a fanfare of sizzle. Initially I turned it every two minutes, quickly increasing that to once every minute. Frequent flipping allows you to really fine tune your finish and keeps you in constant contact with the meat. This monitoring allows you observe changes in appearance, aroma and feel — is the meat still wobbly or is it becoming hard? Understanding these changes is the most reliable way to know when your steak/chop is done, rendering timers, thermometers and articles like this extraneous.
At the 12 minute mark I removed the chop from the pan. It’s temperature read as 157 and climbing, levelling out at 159. After a four minute rest it had dropped to 156. The chop was juicy and, truth be told, I couldn’t stop “sampling” it. As you can see by the photo, it had a beautiful crust. Some of our customers desire an even juicier chop and will disregard the official temperature advisory.
¾ INCH CENTRE CUT CHOPS
Cut from further back in the loin, these succulent babies are what we call fast fryers and they’ll help you get a delicious dinner on the table post haste.
Pork Chop #1: 6 minutes = 153 F. + 1.5 minutes = 175 F.
Pork Chop #2: 7 minutes = 166 F.
Pork Chop #3: 6.5 minutes = 155 F.
And then I ran out of centre cut pork chops. So I’m guessing when I say that 6 minutes and 45 seconds gets you the perfect 160 F chop. But it’s a very educated guess. And, incidentally, all of the above chops tasted, more or less the same; as in - great.
So, as you can see, there are a lot of factors involved, all of which can effect your times. Is your stove’s “medium” the same as mine? How does your pan conduct the heat? Is your thermometer, if you’re using one, properly calibrated? And every pork chop is ever so slightly different — they are muscles from living animals, cut by humans not machines.
The above times are a useful guideline, but, given all the variables, the best way to accurately cook steaks and chops is to read the signs. Constant close observation will allow you, with experience, to read the meat.